
Recently I saw about this new project called exegol, This is a really cool project that sets up a pen testing environment in docker, it has plenty of neat features and tools built in!
What is exegol?
Exegol is an all in one pen testing environment that runs in docker. Exegol uses a python wrapper to do all the magic behind the scenes for you. Some benefits are
- Several images to build from
- Contains large selection of tools
- Designed to be secure
- Runs fast as it’s inside a docker container
- Ability to access the docker desktop via HTTP/VNC
- Command line logging
- Nightly image builds for the bleeding edge builds
Github link can be found here
How to set up exegol?
Exegol will be needed to be installed onto a host OS, it supports,
- Linux - Highly recommended
- Windows WSL / Docker Desktop
- Mac OS
For this is I am running Budgie Ubuntu 20.04. With just Terminator, Docker, python3, pipx, git and Firefox installed, this is because I will be doing all the work inside the containers.
Requirements
You need the following installed
- Docker
- Git
- Python 3
- At least 70gb free storage
Install
If you need pipx run the following:
# install pipx if not already installed, from system package:
sudo apt update && sudo apt install pipx
# OR from pip
python3 -m pip install pipx
If you already have pipx run:
# You can now install Exegol package from PyPI
pipx install exegol

# Or from sources directly
pipx install git+https://github.com/ThePorgs/Exegol
Now exegol is installed we need to ensure the paths are correct for it run:
pipx ensurepath
Now that’s installed we will make a new docker group and will allow the current user to access exegol
# add the sudo group to the user
sudo usermod -aG docker $(id -u -n)

# To apply the new group you must open a new shell
exit
# OR "reload" the user groups with the newly added docker group
newgrp docker
Last we need to allow exegol to have tab complete this is done with the following,
# Using the system package manager
sudo apt install python3-argcomplete

# Or using pip (check if pip packages are included in your $PATH)
pip3 install --user argcomplete

# Or using pipx (check if pipx packages are included in your $PATH)
pipx install argcomplete
Finally we need to add this line to your .bashrc file
eval "$(register-python-argcomplete --no-defaults exegol)"
Making a new container
First we need download an image which will be the base for our containers. The following are the choices of images:
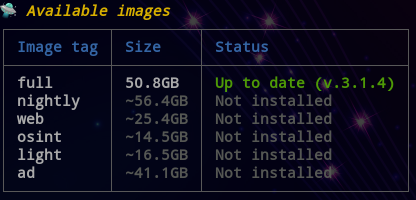
To download an image just run, with the image name you want
exegol install full
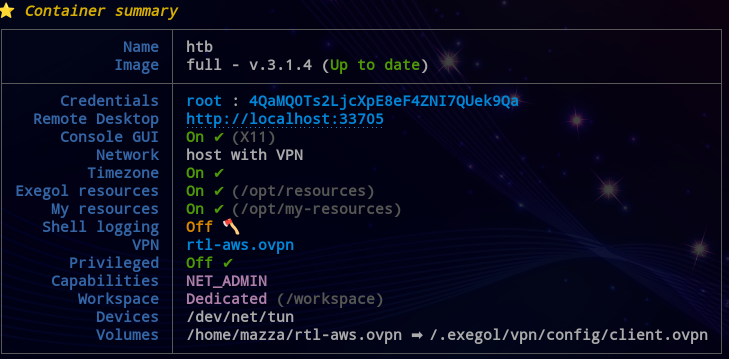
Once this has finished downloading run
exegol info
you should see now that it says it is up-to date. Right now lets make a new container. I am going to make this container with a few arguments:
exegol start htb full --desktop --vpn rtl.-aws.ovpn
This is going to make a new container called htb from the full image allowing desktop access via HTTP and it will connect to the supplied VPN each time the container starts
Working in exegol
To enter a container run with the name of the container you made
exegol start htb
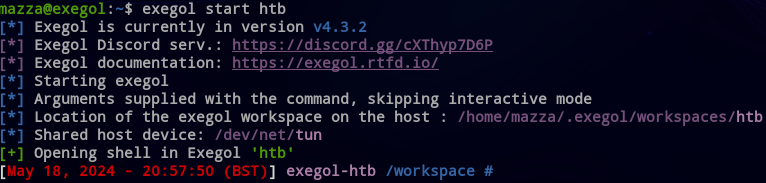
You now have a full shell to the container and can do everything a normal OS could. Now lets talk about folder structure, You will be dropped into the /workspace folder, this is a central folder to hold anything needed. /opt contains most of the tools needed for engagements. opt also contains 2 important folder:
- my-resources
- resources
The my-resources folder is a folder that is mounted inside your host OS to allow easy transfer of files between the host and container. This lives at /home/mazza/.exegol/my-resources Anything placed in here can be accessed by both OS’s. NOTE - This folder is persistent and does not get destroyed when deleting containers.
Another cool feature is the command suggestion . If you type for example xfreerdp it will show an example of the command arguments.

This is neat and can be helpful when not familiar with some args, Its also already set up using variables so if you match those you can just simple hit enter and run the command as it is.
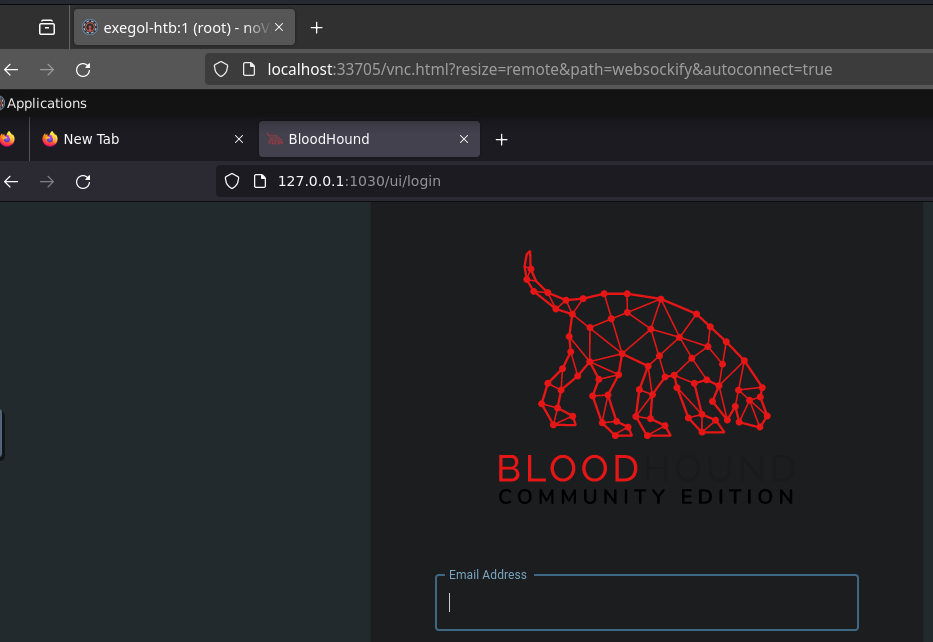
GUI Applications?
Exegol has a pretty cool trick up its sleeve for when you need GUI tools such as BloodHound-CE , If you created the container using the --desktop flag you will notice in the exegol info htb that is has the URL for the desktop mode along with credentials. simply browse to that login with the credentials and you now have FULL desktop access to the container. It runs quite smooth as well. Here is an example of Bloodhound-CE running in the container.
Advanced features
- Command Script Logging - This logs all key strokes and stores them on your host OS and can even be played back in real time.
- Custom Images - Images can be edited then used locally.
- ENV’s can be passed from the host
- hostname of the container can be set if needed for OPSEC reasons
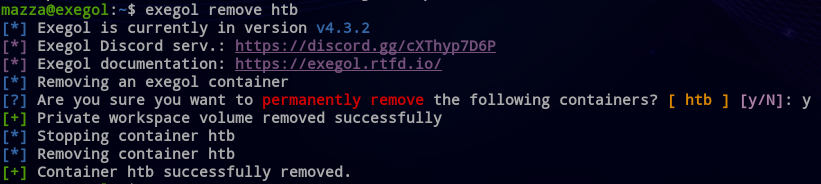
Deleting Containers
For me this is the beauty of it. Once you have finished your engagement you can simply delete you container and that’s it, No worrying that you accidently left some private information in your downloads folder from the engagement.
exegol remove htb
Summary
Exegol is a convenient, professional platform to use in engagements or CTF’s alike. It is blazingly fast when interacting with via cmd line. Its secure by default and allows easy disposal after you have finished with it. The project is still heavily supported and new tools and features get added regularly.